
Eight Coconut Cocktails You Must Sample at Your Upcoming Gathering
Here are my favorite coconut cocktails featuring creamy, tropical tastes! Combine coconut with rum, tequila, or vodka for irresistibly refreshing beverages, ranging from creamy coconut margaritas to traditional piña coladas.
Infusing cocktails with coconut flavor is truly unmatched! It adds a creamy texture and a tropical ambiance to drinks of all varieties. It’s a perfect match with rum, just like the classic piña colada. However, you can also explore more distinctive coconut rum cocktails such as the Bushwacker, or even a coconut margarita or martini!
I’ve been refining coconut cocktails for many years, and I can assure you that the trick isn’t merely adding coconut milk. The finest coconut cocktails blend that rich, creamy essence in innovative ways and complement it with vibrant citrus and top-quality spirits. Continue reading for what I hope will be your new favorite recipes!
The Best Coconut Cocktails to Experience
Coconut Margarita: Presenting a coconut cocktail that’s creamy, cool, refreshing, and an absolute requirement for every coconut aficionado: the coconut margarita! Tropical coconut wonderfully complements the sharpness of lime and the kick of tequila. My favorite element is the toasted coconut rim, which provides a crunchy, tropical essence with every sip. Ingredients: Cream of coconut, tequila, lime juice, triple sec (or Cointreau).
Piña Colada: The most beloved coconut cocktail of all time is the traditional Piña Colada! This iconic drink was created in San Juan, Puerto Rico, in 1954. It features pineapple juice, rum, and cream of coconut, served blended or with crushed ice. Ingredients: White rum, cream of coconut, pineapple juice, frozen pineapple, ice, lime juice.
Coconut Martini: There’s something about the tropical creaminess of coconut that makes it ideal for cocktails. Inspired by my well-loved coconut margarita, this version uses vodka instead of tequila. It results in a cool and creamy beverage, adorned with a crunchy toasted coconut rim. Ingredients: Cream of coconut, lime, vodka.
Coconut Mojito: Looking for a mojito that’s even more fabulous than the classic? Try this Coconut Mojito! Coconut adds a tropical sweetness and creamy texture to this drink that is simply irresistible. Cream of coconut and coconut rum unite to create something magical. Ingredients: Mint, white rum, coconut rum, lime juice, cream of coconut, soda water.
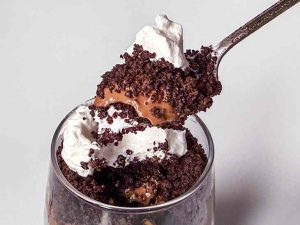
Bushwacker: Here’s a coconut cocktail that will astonish you with its creamy, chocolaty goodness: the Bushwacker! This is one of my top choices, combining both refreshing and rich elements. Created in the 1970s, it’s like a blend of a chocolate milkshake and piña colada. It’s wonderfully smooth with hints of chocolate, coffee, and vanilla. Ingredients: Aged rum, Kahlua, crème de cacao, cream of coconut, milk, ice.
Painkiller: Love piña coladas? Then you absolutely have to experience a Painkiller cocktail! This 1970s coconut drink is a twist on the classic piña colada, but even more delightful. It showcases aged rum, cream of coconut, and orange juice, adding depth and sophistication to this elegant drink. Ingredients: Aged rum, pineapple juice, cream of coconut, orange juice, grated nutmeg.
Pineapple Coconut Mimosa: Here’s a coconut cocktail that’s tropical, fruity, and bubbly all at once: the Pineapple Coconut Mimosa! This variation on the traditional brunch drink might be even better. Sweet pineapple juice uniquely balances with crisp, dry champagne. Creamy coconut milk creates a frothy topping, ensuring the bubbles never fade! Ingredients: Pineapple juice, sparkling wine, coconut milk.
Chi Chi Drink: Adore a classic Piña Colada? Then this drink is just for you: the Chi Chi drink! This vodka-based Piña Colada rivals the original in flavor, in my opinion. It’s surprising how well it compares to the traditional rum-based version. Ingredients: Frozen pineapple, ice, vodka, cream of coconut, pineapple juice.
Ingredient spotlight: cream of coconut
You might believe that coconut cream delivers the flavor in these coconut cocktails. However, most of the cocktails below utilize a special ingredient called cream of coconut! Look for this when preparing the drinks below. Here’s what you should know about cream of coconut versus coconut cream:
Cream of coconut is a sweetened syrup designed for cocktails made with coconut cream and sugar. It comes in convenient squeeze bottles for easy addition to drinks. Cream of coconut is readily available online or at your local liquor store. Well-known brands include Coco Real or Coco Lopez.
Coconut cream is unsweetened! It’s thick, has a strong coconut flavor, and is sold in cans near the coconut milk. Coconut cream is produced by chilling coconut milk and skimming off the layer of cream that rises to the top.
Dietary notes

Adaptable Carrot Salad Recipe for All-Year Delight
### About the Author: Holly Nilsson
Holly Nilsson is the visionary behind Spend With Pennies, a site devoted to offering straightforward and comforting recipes that address the realities of everyday cooking. Fueled by a love for nostalgic tastes and uncomplicated cooking methods, Holly’s mission is to enable busy home chefs to create delightful dishes that are both enjoyable and doable.
Her culinary adventure is captured in her book, “Everyday Comfort,” which acts as a source of inspiration for readers seeking hearty, home-cooked delights. Holly’s method highlights the significance of crafting meals that bring about a sense of warmth and familiarity, transforming cooking into a pleasurable activity instead of a task.
For those interested in delving deeper into Holly’s culinary innovations, her posts and recipes are available on her website.
#### Follow Holly on Social Media:
– [Pinterest](https://www.pinterest.com/spendpennies/)
– [Facebook](https://www.facebook.com/ispendwithpennies/)
– [Twitter](http://spendpennies)
– [Instagram](https://www.instagram.com/spendpennies/)
Holly Nilsson continues to motivate home cooks with her commitment to making cooking approachable and enjoyable for everyone.
7-Day Nutritious Meal Schedule for September 1-7
**7-Day Healthy Meal Plan for September 1-7**
As the summer warmth starts to diminish and the refreshing air of September arrives, it’s an ideal moment to reboot and concentrate on nutritious eating habits. This 7-day meal plan is crafted to deliver balanced nutrition, featuring seasonal fruits and varied flavors to make your meals enjoyable and wholesome.
**Day 1:**
– **Breakfast:** Overnight oats prepared with almond milk, chia seeds, sliced peaches, and a dash of cinnamon.
– **Lunch:** Grilled chicken salad consisting of mixed greens, cherry tomatoes, cucumber, avocado, and a lemon-tahini dressing.
– **Dinner:** Baked salmon glazed with honey-mustard, paired with quinoa and steamed broccoli.
– **Snack:** Slices of apple with almond butter.
**Day 2:**
– **Breakfast:** Greek yogurt parfait layered with granola, blueberries, and a drizzle of honey.
– **Lunch:** Whole grain wrap filled with turkey, spinach, hummus, and shredded carrots.
– **Dinner:** Tofu stir-fry with bell peppers, snap peas, and brown rice.
– **Snack:** A handful of mixed nuts.
**Day 3:**
– **Breakfast:** Smoothie made with spinach, banana, almond milk, and a scoop of protein powder.
– **Lunch:** Lentil soup accompanied by whole-grain bread.
– **Dinner:** Grilled shrimp tacos topped with cabbage slaw and avocado on corn tortillas.
– **Snack:** Celery sticks served with hummus.
**Day 4:**
– **Breakfast:** Avocado toast on whole-grain bread garnished with poached eggs and cherry tomatoes.
– **Lunch:** Quinoa salad featuring black beans, corn, diced bell peppers, and lime vinaigrette.
– **Dinner:** Baked chicken breast with roasted sweet potatoes and green beans.
– **Snack:** Sliced pear dusted with cinnamon.
**Day 5:**
– **Breakfast:** Chia pudding made with coconut milk, embellished with kiwi and shredded coconut.
– **Lunch:** Bell peppers stuffed with spinach and feta.
– **Dinner:** Beef stir-fry with broccoli and carrots, served atop brown rice.
– **Snack:** Rice cakes with peanut butter.
**Day 6:**
– **Breakfast:** Whole-grain pancakes topped with fresh strawberries and a spoonful of Greek yogurt.
– **Lunch:** Caprese salad featuring fresh mozzarella, tomatoes, basil, and balsamic glaze.
– **Dinner:** Grilled cod seasoned with lemon and herbs, accompanied by couscous and asparagus.
– **Snack:** Trail mix including dried fruits and seeds.
**Day 7:**
– **Breakfast:** Scrambled eggs mixed with spinach and mushrooms, accompanied by whole-grain toast.
– **Lunch:** Chickpea and avocado salad with cherry tomatoes and cucumber.
– **Dinner:** Vegetable curry with chickpeas, served over basmati rice.
– **Snack:** A piece of dark chocolate paired with a handful of almonds.
This meal plan focuses on whole foods, lean proteins, and abundant fruits and vegetables to ensure a nutritious diet. Modify portion sizes and ingredients as necessary to align with your dietary needs and preferences. Savor the tastes of September and fuel your body with these nourishing meals!
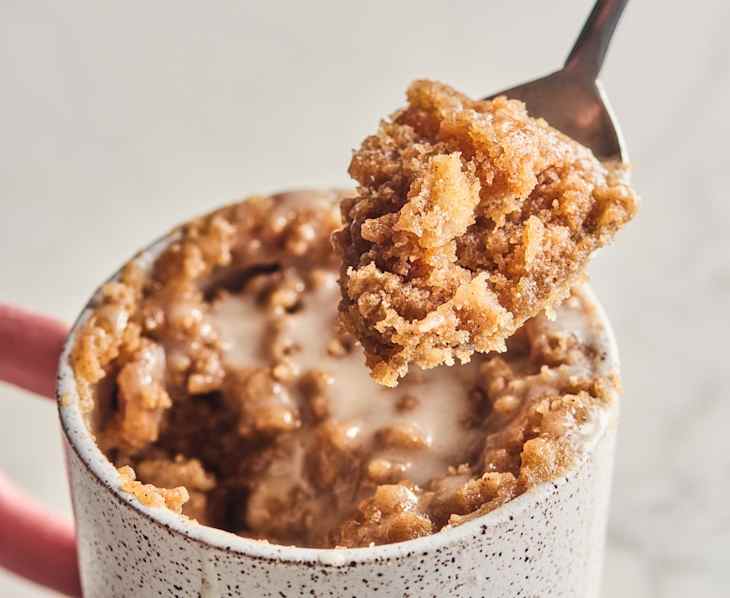
The 10-Minute “Coffee Cake Mug Cake” I Make for Dessert AND Breakfast

Buttery crumbs meet warm cinnamon for coffee cake bliss.
READ MORE…
30 Super-Simple Recipes for New Bakers and Weeknight Warriors

Even if you’re just getting started these will make you feel like a star baker.
READ MORE…
Eight Coconut Cocktails You Must Sample at Your Upcoming Gathering
Here are my favorite coconut cocktails featuring creamy, tropical tastes! Combine coconut with rum, tequila, or vodka for irresistibly refreshing beverages, ranging from creamy coconut margaritas to traditional piña coladas.
Infusing cocktails with coconut flavor is truly unmatched! It adds a creamy texture and a tropical ambiance to drinks of all varieties. It’s a perfect match with rum, just like the classic piña colada. However, you can also explore more distinctive coconut rum cocktails such as the Bushwacker, or even a coconut margarita or martini!
I’ve been refining coconut cocktails for many years, and I can assure you that the trick isn’t merely adding coconut milk. The finest coconut cocktails blend that rich, creamy essence in innovative ways and complement it with vibrant citrus and top-quality spirits. Continue reading for what I hope will be your new favorite recipes!
The Best Coconut Cocktails to Experience
Coconut Margarita: Presenting a coconut cocktail that’s creamy, cool, refreshing, and an absolute requirement for every coconut aficionado: the coconut margarita! Tropical coconut wonderfully complements the sharpness of lime and the kick of tequila. My favorite element is the toasted coconut rim, which provides a crunchy, tropical essence with every sip. Ingredients: Cream of coconut, tequila, lime juice, triple sec (or Cointreau).
Piña Colada: The most beloved coconut cocktail of all time is the traditional Piña Colada! This iconic drink was created in San Juan, Puerto Rico, in 1954. It features pineapple juice, rum, and cream of coconut, served blended or with crushed ice. Ingredients: White rum, cream of coconut, pineapple juice, frozen pineapple, ice, lime juice.
Coconut Martini: There’s something about the tropical creaminess of coconut that makes it ideal for cocktails. Inspired by my well-loved coconut margarita, this version uses vodka instead of tequila. It results in a cool and creamy beverage, adorned with a crunchy toasted coconut rim. Ingredients: Cream of coconut, lime, vodka.
Coconut Mojito: Looking for a mojito that’s even more fabulous than the classic? Try this Coconut Mojito! Coconut adds a tropical sweetness and creamy texture to this drink that is simply irresistible. Cream of coconut and coconut rum unite to create something magical. Ingredients: Mint, white rum, coconut rum, lime juice, cream of coconut, soda water.
Bushwacker: Here’s a coconut cocktail that will astonish you with its creamy, chocolaty goodness: the Bushwacker! This is one of my top choices, combining both refreshing and rich elements. Created in the 1970s, it’s like a blend of a chocolate milkshake and piña colada. It’s wonderfully smooth with hints of chocolate, coffee, and vanilla. Ingredients: Aged rum, Kahlua, crème de cacao, cream of coconut, milk, ice.
Painkiller: Love piña coladas? Then you absolutely have to experience a Painkiller cocktail! This 1970s coconut drink is a twist on the classic piña colada, but even more delightful. It showcases aged rum, cream of coconut, and orange juice, adding depth and sophistication to this elegant drink. Ingredients: Aged rum, pineapple juice, cream of coconut, orange juice, grated nutmeg.
Pineapple Coconut Mimosa: Here’s a coconut cocktail that’s tropical, fruity, and bubbly all at once: the Pineapple Coconut Mimosa! This variation on the traditional brunch drink might be even better. Sweet pineapple juice uniquely balances with crisp, dry champagne. Creamy coconut milk creates a frothy topping, ensuring the bubbles never fade! Ingredients: Pineapple juice, sparkling wine, coconut milk.
Chi Chi Drink: Adore a classic Piña Colada? Then this drink is just for you: the Chi Chi drink! This vodka-based Piña Colada rivals the original in flavor, in my opinion. It’s surprising how well it compares to the traditional rum-based version. Ingredients: Frozen pineapple, ice, vodka, cream of coconut, pineapple juice.
Ingredient spotlight: cream of coconut
You might believe that coconut cream delivers the flavor in these coconut cocktails. However, most of the cocktails below utilize a special ingredient called cream of coconut! Look for this when preparing the drinks below. Here’s what you should know about cream of coconut versus coconut cream:
Cream of coconut is a sweetened syrup designed for cocktails made with coconut cream and sugar. It comes in convenient squeeze bottles for easy addition to drinks. Cream of coconut is readily available online or at your local liquor store. Well-known brands include Coco Real or Coco Lopez.
Coconut cream is unsweetened! It’s thick, has a strong coconut flavor, and is sold in cans near the coconut milk. Coconut cream is produced by chilling coconut milk and skimming off the layer of cream that rises to the top.
Dietary notes
Read More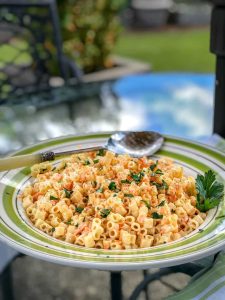
Adaptable Carrot Salad Recipe for All-Year Delight
### About the Author: Holly Nilsson
Holly Nilsson is the visionary behind Spend With Pennies, a site devoted to offering straightforward and comforting recipes that address the realities of everyday cooking. Fueled by a love for nostalgic tastes and uncomplicated cooking methods, Holly’s mission is to enable busy home chefs to create delightful dishes that are both enjoyable and doable.
Her culinary adventure is captured in her book, “Everyday Comfort,” which acts as a source of inspiration for readers seeking hearty, home-cooked delights. Holly’s method highlights the significance of crafting meals that bring about a sense of warmth and familiarity, transforming cooking into a pleasurable activity instead of a task.
For those interested in delving deeper into Holly’s culinary innovations, her posts and recipes are available on her website.
#### Follow Holly on Social Media:
– [Pinterest](https://www.pinterest.com/spendpennies/)
– [Facebook](https://www.facebook.com/ispendwithpennies/)
– [Twitter](http://spendpennies)
– [Instagram](https://www.instagram.com/spendpennies/)
Holly Nilsson continues to motivate home cooks with her commitment to making cooking approachable and enjoyable for everyone.
Read More
7-Day Nutritious Meal Schedule for September 1-7
**7-Day Healthy Meal Plan for September 1-7**
As the summer warmth starts to diminish and the refreshing air of September arrives, it’s an ideal moment to reboot and concentrate on nutritious eating habits. This 7-day meal plan is crafted to deliver balanced nutrition, featuring seasonal fruits and varied flavors to make your meals enjoyable and wholesome.
**Day 1:**
– **Breakfast:** Overnight oats prepared with almond milk, chia seeds, sliced peaches, and a dash of cinnamon.
– **Lunch:** Grilled chicken salad consisting of mixed greens, cherry tomatoes, cucumber, avocado, and a lemon-tahini dressing.
– **Dinner:** Baked salmon glazed with honey-mustard, paired with quinoa and steamed broccoli.
– **Snack:** Slices of apple with almond butter.
**Day 2:**
– **Breakfast:** Greek yogurt parfait layered with granola, blueberries, and a drizzle of honey.
– **Lunch:** Whole grain wrap filled with turkey, spinach, hummus, and shredded carrots.
– **Dinner:** Tofu stir-fry with bell peppers, snap peas, and brown rice.
– **Snack:** A handful of mixed nuts.
**Day 3:**
– **Breakfast:** Smoothie made with spinach, banana, almond milk, and a scoop of protein powder.
– **Lunch:** Lentil soup accompanied by whole-grain bread.
– **Dinner:** Grilled shrimp tacos topped with cabbage slaw and avocado on corn tortillas.
– **Snack:** Celery sticks served with hummus.
**Day 4:**
– **Breakfast:** Avocado toast on whole-grain bread garnished with poached eggs and cherry tomatoes.
– **Lunch:** Quinoa salad featuring black beans, corn, diced bell peppers, and lime vinaigrette.
– **Dinner:** Baked chicken breast with roasted sweet potatoes and green beans.
– **Snack:** Sliced pear dusted with cinnamon.
**Day 5:**
– **Breakfast:** Chia pudding made with coconut milk, embellished with kiwi and shredded coconut.
– **Lunch:** Bell peppers stuffed with spinach and feta.
– **Dinner:** Beef stir-fry with broccoli and carrots, served atop brown rice.
– **Snack:** Rice cakes with peanut butter.
**Day 6:**
– **Breakfast:** Whole-grain pancakes topped with fresh strawberries and a spoonful of Greek yogurt.
– **Lunch:** Caprese salad featuring fresh mozzarella, tomatoes, basil, and balsamic glaze.
– **Dinner:** Grilled cod seasoned with lemon and herbs, accompanied by couscous and asparagus.
– **Snack:** Trail mix including dried fruits and seeds.
**Day 7:**
– **Breakfast:** Scrambled eggs mixed with spinach and mushrooms, accompanied by whole-grain toast.
– **Lunch:** Chickpea and avocado salad with cherry tomatoes and cucumber.
– **Dinner:** Vegetable curry with chickpeas, served over basmati rice.
– **Snack:** A piece of dark chocolate paired with a handful of almonds.
This meal plan focuses on whole foods, lean proteins, and abundant fruits and vegetables to ensure a nutritious diet. Modify portion sizes and ingredients as necessary to align with your dietary needs and preferences. Savor the tastes of September and fuel your body with these nourishing meals!
Read More
The 10-Minute “Coffee Cake Mug Cake” I Make for Dessert AND Breakfast
Buttery crumbs meet warm cinnamon for coffee cake bliss.
READ MORE…
30 Super-Simple Recipes for New Bakers and Weeknight Warriors
Even if you’re just getting started these will make you feel like a star baker.
READ MORE…
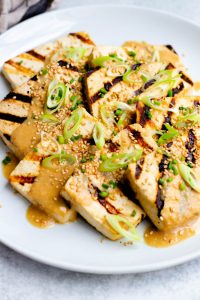
Easy and Tasty Grilled Tofu Recipe
**Tofu on the Grill: Insights and Flavor Options**
Grilling tofu is an excellent method to savor a plant-based protein infused with a wonderfully smoky taste. Nevertheless, not all tofu is suitable for grilling. To make sure your tofu performs well on the grill, it’s important to select the correct variety. Steer clear of soft or silken tofu, as these types are too fragile and won’t maintain their shape or consistency under the high temperatures of a grill. Instead, choose firm or extra-firm tofu, which is sturdy enough to endure grilling and will soak up marinades effectively.
**Getting Tofu Ready for the Grill**
1. **Press the Tofu:** Prior to marinating, press the tofu to eliminate excess moisture. This step is vital as it helps the tofu absorb the marinade more thoroughly. Utilize a tofu press or wrap the tofu in a clean kitchen towel, placing a heavy item on top for at least 15-30 minutes.
2. **Marinate the Tofu:** After pressing, slice the tofu into pieces or cubes, based on your preference. Marinating is essential for imparting flavor to the tofu. Let the tofu marinate for a minimum of 30 minutes, or for several hours if you desire a more robust flavor.
3. **Grill the Tofu:** Preheat your grill to medium-high heat. Lightly coat the grill grates with oil to avoid sticking. Arrange the marinated tofu on the grill and cook for roughly 5-7 minutes on each side, or until grill marks form and the tofu is fully heated.
**Flavor Variation: Mediterranean-Inspired Marinade**
For a tasty Mediterranean flair, consider this savory marinade:
– 6 tablespoons soy sauce
– ¼ cup olive oil
– 1 teaspoon garlic powder
– 1 teaspoon onion powder
– 1 teaspoon smoked paprika
This mix of ingredients delivers a deep, savory flavor with a touch of smokiness, perfectly enhancing the natural taste of grilled tofu. The soy sauce creates a salty umami foundation, while the olive oil adds richness. Garlic and onion powders contribute complexity, and smoked paprika imparts a subtle smokiness that elevates the grilled experience.
**Serving Ideas**
Grilled tofu can be enjoyed in numerous ways. Combine it with grilled vegetables, serve it atop a bed of greens for a robust salad, or include it in wraps or sandwiches. The Mediterranean-style tofu is especially tasty when paired with couscous, roasted vegetables, or a vibrant tomato and cucumber salad.
By picking the right kind of tofu and employing a flavorful marinade, you can prepare a delectable and adaptable grilled tofu dish that will delight both plant-based enthusiasts and meat lovers.
Read More
The Only Coffee Maker Worth Snagging This Labor Day Weekend, According to a Former Barista (Itâs on Sale!)

âMakes the best coffee Iâve tasted!â
READ MORE…


The $26 Kitchen Tool That âCuts Prep Time in Halfâ Is Nearly 50% Off Right Now

Itâs nearly 50% off.
READ MORE…

I Tried âClutter Cleansingâ My Chaotic Cabinets, and My Kitchen Hasnât Been This Organized in Decades

I wish I did it sooner.
READ MORE…